How To Connect a Battery To a Car?
Every vehicle needs a reliable battery. Whether it's your everyday car, your RV, or a 4x4, nothing takes the fun out of a ride than being stuck on the road with no power.
A lot of people would probably assume that hooking up a car battery requires a professional. While this isn't entirely false, you actually have the option to do it yourself too. If you have enough experience handling power packs and have the right tools at hand, connecting a battery to your vehicle isn't all that hard.
How Do You Connect a Car and RV Battery?
Let's start with a basic car battery first. Here's the step-by-step process of disconnecting your existing battery and replacing it with a new one.
Step 1: Locate the terminals
Make sure to remove the negative (-) terminal of your battery first to avoid wiring and battery damage by accidentally grounding tools. Then, remove the positive (+) terminal.
Step 2: Battery removal and checking of the installation area
Undo the hold-down clamp to remove the battery from your vehicle. You're now about to fit your new power pack in the same space, so make sure the area is big enough to fit it in.
Step 3: Check for corrosion
Corrosion is one of the top causes of battery decline. If you are using a battery tray, check the area for any signs of rust and have it cleaned. Do the same to the battery itself, especially the battery terminals. Corroded steel parts should ideally be dried and coated with acid-proof paint. Also, terminal clamps and cables that are badly corroded should be replaced.
Step 4: Placing the new battery
Check the cable and starter motor connections. Tighten if necessary, then put your new battery in the tray. Make sure the terminal posts are positioned the same as the battery.
Step 5: Secure the power pack
Place the hold-down clamps and tighten them securely to keep the battery from moving especially when you're driving.
Step 6: Finishing touches
Coat the battery posts and cable connections with a thin layer of high-temperature grease. Replace cablesnegative cables firstand tighten connections just enough. Note: Never hammer your cable connections on the battery posts to avoid damage.
See? All these would most likely be familiar to those who have had a hand in battery handling before, or even long-time car owners.

Now, let's move on to vehicles requiring a 12V dual battery system. A little bit of backgrounddual battery systems are mostly used for leisure or recreational vehicles like 4WDs or caravans. The purpose behind this is to have separate power for running the vehicle and the electronics on board it.
A regular vehicle battery wouldn't be enough to keep your devices and portable appliances powered, the same way an auxiliary battery is not suited for kickstarting an engine. Having two power packs is the only ideal way to keep everything running, which is crucial, especially for off-grid travels.
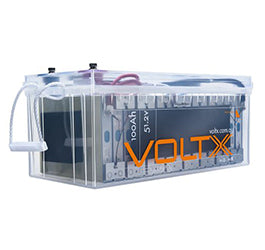
Ideally, your secondary battery should be a deep cycle battery, such as a LiFePO4 battery. Deep cycle batteries are known for their ability to discharge down to 80% without incurring damage, which translates to a longer runtime.
If you're enjoying the outdoors in your 4WD or RV soon, here are the steps to install a dual battery setup:
Step 1: Mounting your auxiliary battery
Place your secondary battery on your rig and make sure you have enough wires to make all the necessary connections to it. Disconnect your starter battery after.
Step 2: Get the VSR ready
Mount your Voltage Sensitive Relay (VSR) and put it close to the main battery but away from any source of heat or moving parts.
Step 3: Work on your cables
Cut the cables to length and fit lugs to their bare ends. Do this by stripping away 15mm of insulation and crimping them in place. Slide the heat shrink over the lug and seal it by applying heat.
Step 4: VSR and battery earthing
Earth the relay using the black wire attached to your VSR. Then, connect the VSR to your main battery and earth your second battery.
Step 5: Put the attachments in place
Attach the VSR to the mounting plate. Note that the positive (+) cables should not be attached to both of your batteries. Attach the negative leads insteadfirst to your starter battery then to the auxiliary battery.
Step 6: Testing time!
After everything is set into place, it's time to test your system with a multimeter.
Ready to power your next trip? Follow these simple steps and get moving! However, if you have no prior experience installing batteries, it's always best to get help instead to avoid damage and potential safety issues.
Your battery quality also plays a crucial role in your overall system performance. See to it that you get a good one with reliable power that will keep your vehicle and essentials running smoothly. For great picks on auxiliary batteries, check out our collection of deep cycle 12V lithium batteries at Outbax!