Have you ever wondered how solar panels are made? You see them left and right, anyway. Using solar energy has been gaining more attention from both homeowners and outdoor enthusiasts due to the number of benefits they present. Aside from being eco-friendly, this will help reduce your monthly electricity bills which will be of great help in the long run.
Learning how solar panels are constructed is handy knowledge to have especially if you're planning to buy one. These don't come cheap, so you want to know exactly what you're getting to ensure good value for your money.

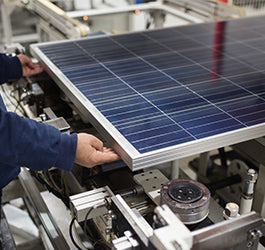
Here's a little step-by-step guide on how these famous solar panels are made. Read on for a bit of background that might help you decide which type to get as well.
Step 1: Silicone is the material used for solar panels. This is made by heating sand at a very high temperature to form crystallised silicone, which is collected once it has cooled.
Step 2: The collected silicone rocks are melted together forming ingots. Ingots are metal blocks with a cylindrical shape. During the melting process, the machine operator should ensure that the atoms are aligned to infuse boron. This infusion will give the ingots a positive electricity polarity for later use.
Step 3: After the ingots have cooled, they are polished into smooth, flat sides. After this, the manufacturers begin to slice discs or silicon wafers as thinly as possible to minimise waste and increase production efficiency.
Step 4: It's time to polarise the conductors. After the metal conductor (boron) is infused into the silicon wafers, it forms 2 types of silicones. The first one is the N-type silicone which lies on the surface of the solar panel and the P-type silicone which lies below it.
Similar to the reaction between positive and negative energy, these two silicone types will create a power imbalance in the solar panel and will try to fill the voids in each other as a result.

Step 5: As mentioned earlier, the N-type and P-type silicones that make up the solar cells are imbalanced so when constructing the solar panel, they are layered in a grid-like matrix. The electrons are stimulated to move and correct the imbalance every time sunlight hits the panel. This process occurs repeatedly, which will eventually lead to the generation of electricity.
Step 6: The finishing touch of the solar panel manufacturing process is the glass and coating. A good quality panel should be made with weatherproof glass in the outer layer and then topped with an anti-reflective coating that encourages light absorption.
Step 7: Time to install your solar panels. This should be installed by experts for proper angling and linking of your solar panels to your existing power systems. It's also important to note that installation will require additional solar panel accessories aside from wiring too, such as an inverter or if you're pairing it with a solar battery, a solar charge regulator.
Solar panel installation also varies depending on the type of panels you're setting up. Fixed solar panels are often used in households and require the most installation while flexible solar panels are usually used for RVs. In some camping settings, portable solar panels are preferred for easy transfer to where the sunlight shines the most.
Once you have your solar panels installed, see to it that you practice regular maintenance. This includes checking them after extreme weather conditions and monthly solar panel cleaning to ensure maximum efficiency. Solar panels have an average lifespan of up to 25 years, so be sure to take care of yours well so you can make the most out of them!